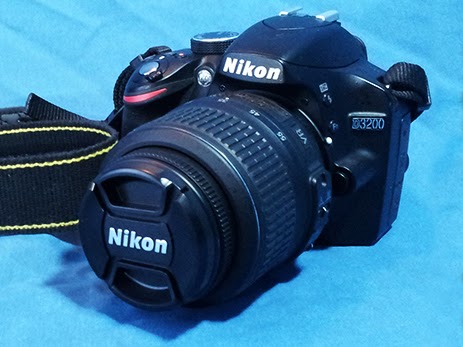
 |
| Nikon D3200 |
I was at the beach shooting beautiful scenery when I stepped into the deep and got water inside my camera's viewfinder. I put my camera, lens and all, in a bag of rice for the next 12 hours to soak up any moisture. By the time I got home, the water was dried, but there was crust inside the viewfinder! This is a guide to help you find the hidden screws and open up your Nikon D3200 with relative ease so you can clean your viewfinder. As always, read the disclaimer before proceeding.
Disclaimer:
This how-to guide should not be followed by anyone who has anger issues, is clumsy, or is not familiar with tinkering with delicate electronics. By even attempting to follow this tutorial or open your camera, you not only risk voiding your warranty, but you also agree that you are solely and absolutely responsible for any damage caused to your precious camera. I cannot and will not be held responsible for what you do. Now that the legalities are out of the way, let’s open the camera (and clean that viewfinder in my case)!
Supplies you will need:
Screwdrivers: a small phillips and a small flathead.
Needle (a small sewing needle or a small safety pin will work)
Cotton Swabs (preferably lint-free, like a medical grade styrofoam if you can get them). I used cotton, but had to be watchful that I didn't leave lint behind.
50% rubbing alcohol cleaning solution (can also dilute 90% alcohol cleaning solution with distilled water to make it ~50%.
Steps:
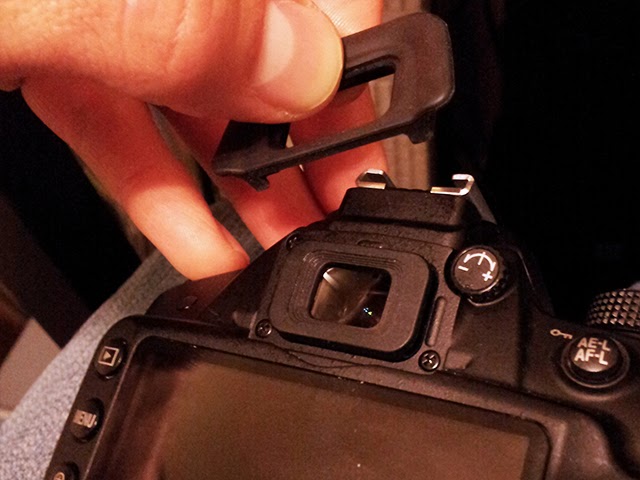 |
Figure 1. Pad slides up and off. Remove battery, memory card, shoulder strap, rubber pad around viewfinder.
|
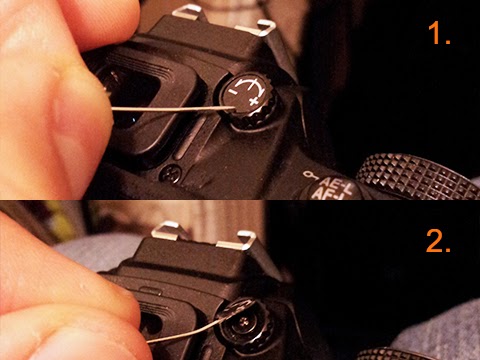 |
Figure 2. Remove the hidden screw. under +/- sticker on viewfinder focus knob.
|
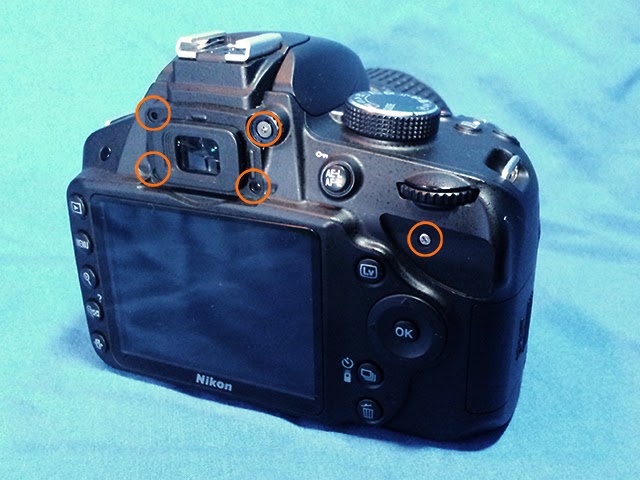 |
Figure 3. Notice the screw circled on far right was hidden under rubber pad. Remove all screws that are circled.
|
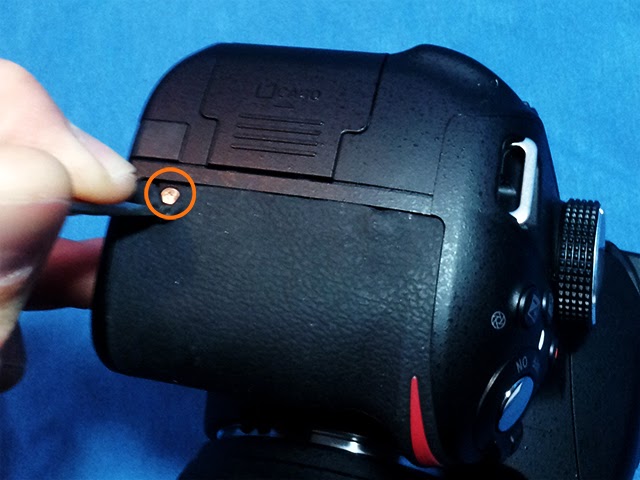 |
| Figure 4. Use a flat head screwdriver to hold back the rubber while unscrewing. |
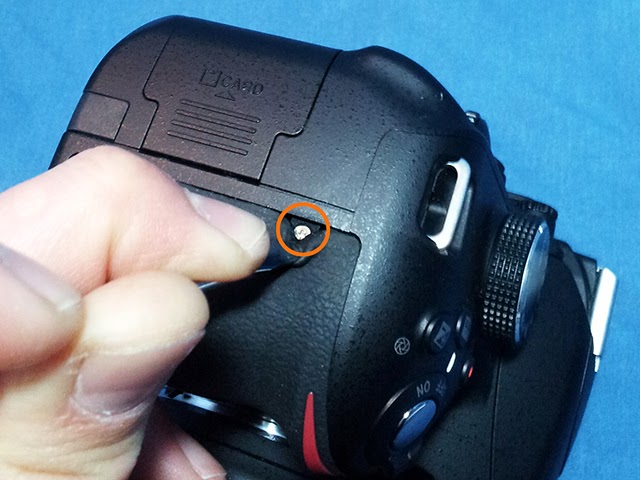 |
| Figure 5. Same as above. Remove this screw as well. |
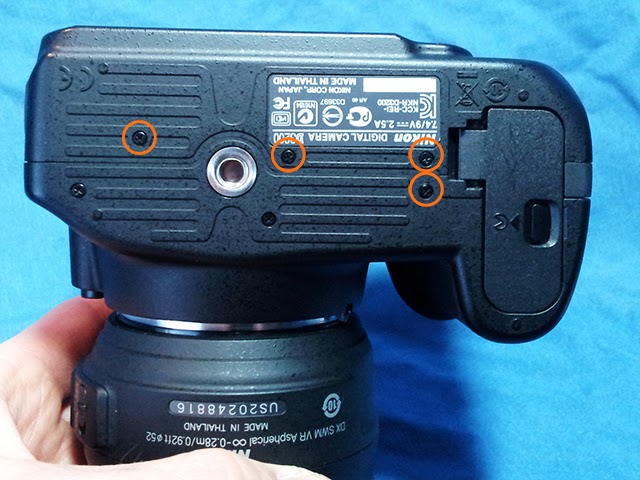 |
| Figure 6. Unscrew those circled. |
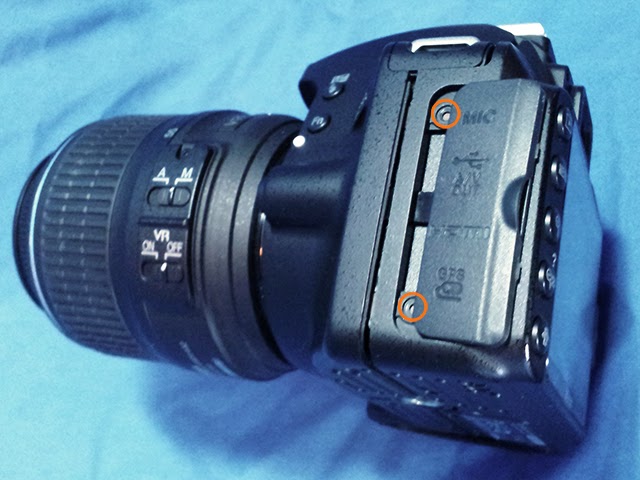 |
| Figure 7. Two more hidden screws to remove. |
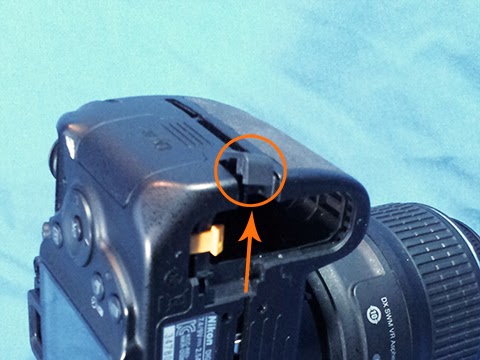 |
| Figure 8. Unplug the rubber by the battery door. |
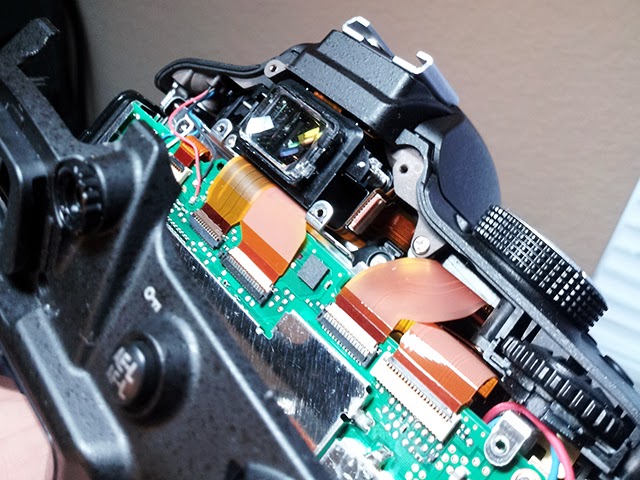 |
| Figure 9. With both the rubber battery plug and video port flap opened, carefully open the back keeping in mind there is a delicate ribbon cable running from the camera body to the screen. |
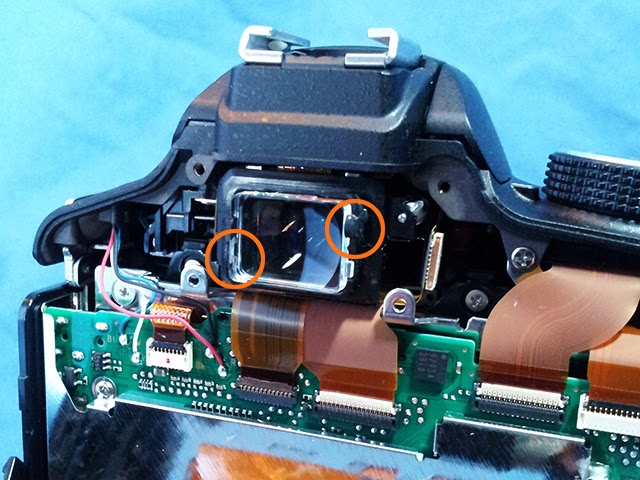 |
| Figure 10. Two rubber glue spots need to be poked with the needle. |
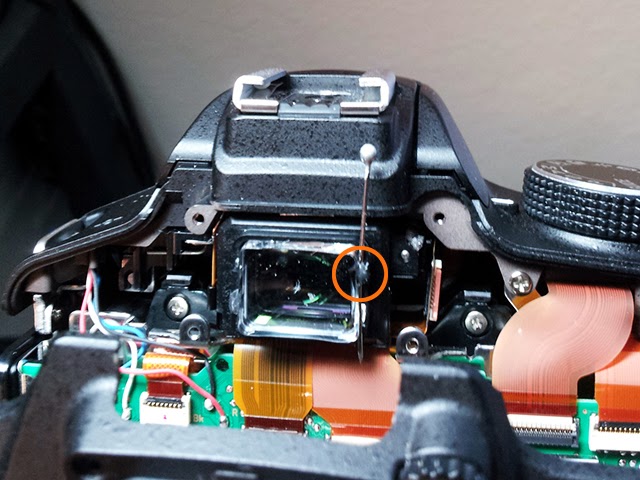 |
| Figure 11. Loosen the glue with 1 or 2 needle piercings and use the needle as a door handle. |
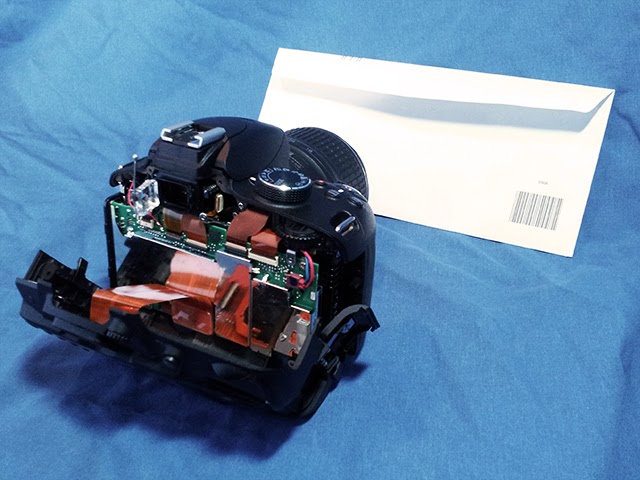 |
| Figure 12. Place a bright object in front of the lens (with the lens cap off) to let light pass through and out the viewfinder. This will help you spot the dirt. |
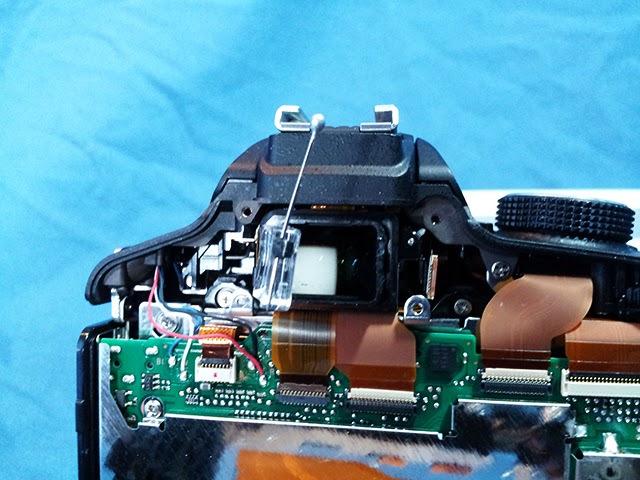 |
| Figure 13. Open the first lens. |
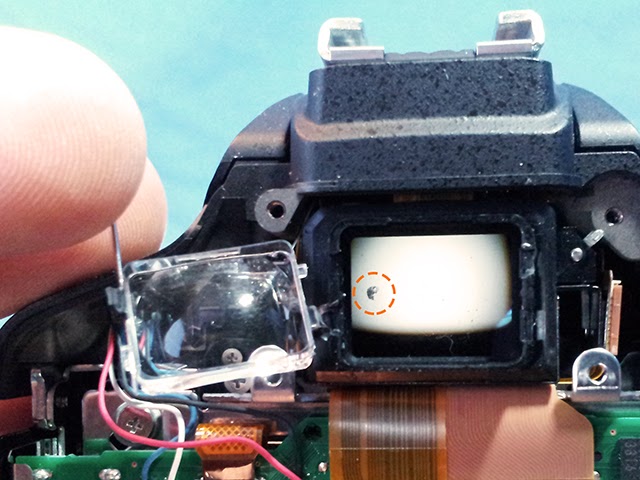 |
| Figure 14. Observe areas that need cleaning. |
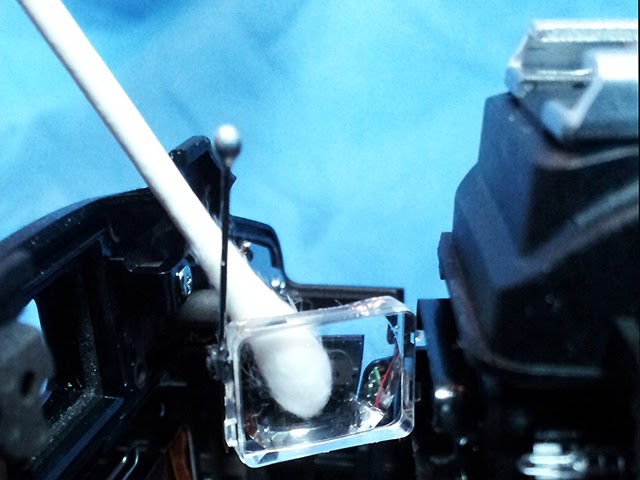 |
| Figure 15. A drop of 50% rubbing alcohol is enough for each round of cleaning. |
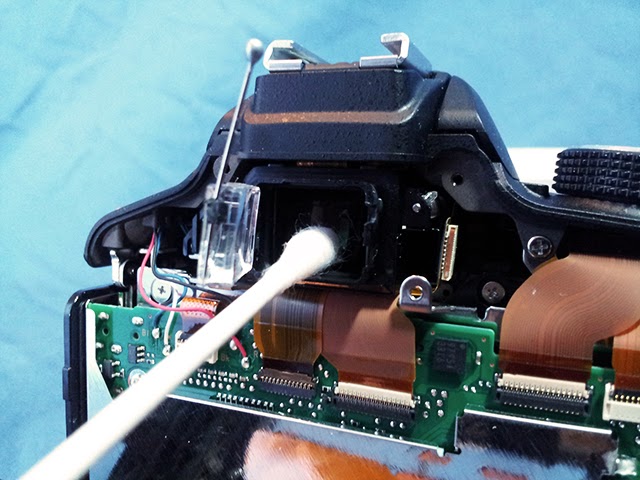 |
| Figure 16. Don't leave any lint behind on the inner viewfinder lens. Again, observe carefully before reassembling the camera. |
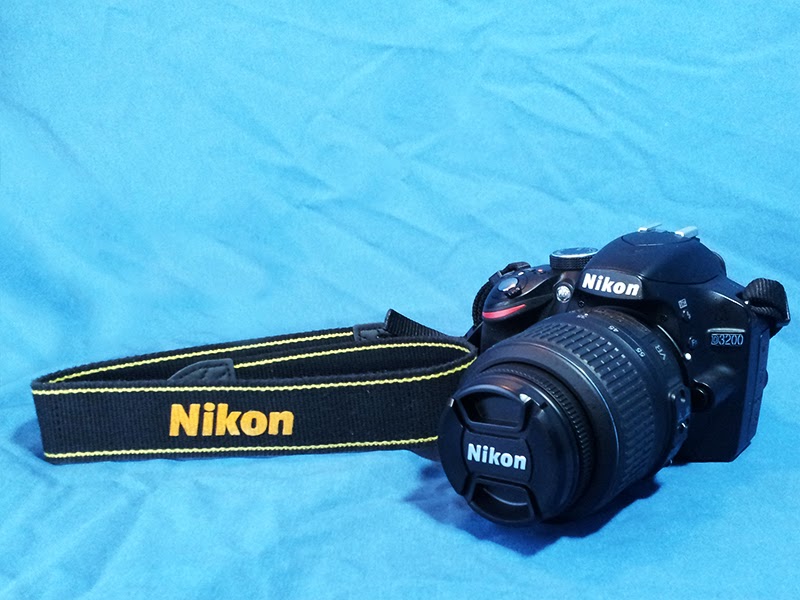 |
| Figure 17. Reassemble and enjoy your clean camera. |


Thanks, this helped a bunch. I also fixed blured viewfinder with a piece of straw from the cotton bud. What an improvement! :)
ReplyDeleteHave you got any further disassembly instructions? I am trying to fix the "stuck wheel" problem that is probably causing my press shutter error, but I havent figured out yet how to get past the main board to find said wheel.
ReplyDeleteThank you!!
ReplyDelete